We are excited to announce the latest release! DataClarity 2020.5 brings significant enhancements and exciting new capabilities such as datasets certification, data cleaning, scalar script function for data science, user activities audit, and more. Let’s take a look at this major release.
Data Preparation
Certify datasets
To help data analysts find datasets that are trusted and recommended for their analysis, you can certify the datasets. For best search results, only certify the datasets that are valuable and considered the official source of enterprise information. Datasets certification ensures the data is reliable and can be used across the organization.
Before performing this task, confirm that users have the dedicated permission to certify datasets, granted in Access Manager. If you can certify datasets, you can find the Certify option under the More actions menu for the dataset. Users can mark datasets as certified by selecting the Certify this dataset check box. In addition, you can add a note about the certification status with descriptive information.
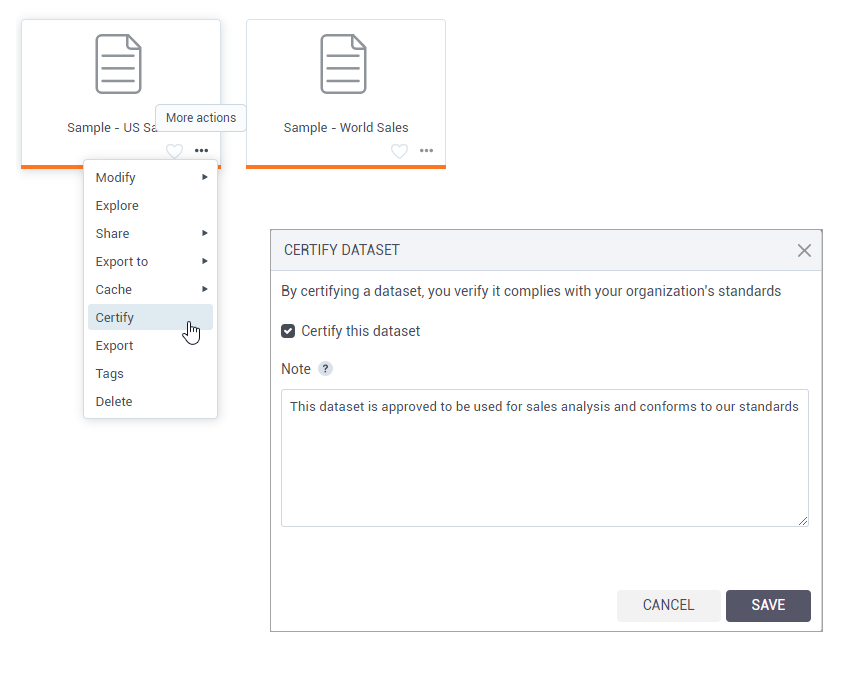
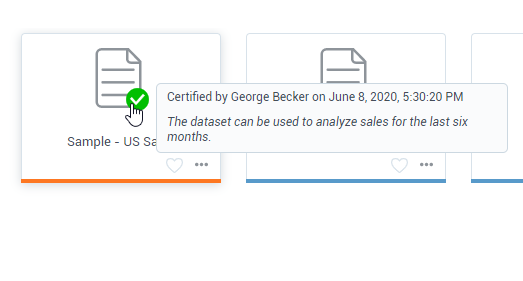
Certified datasets appear with a green check mark over the dataset icon. Hovering over the certification icon will reveal a tooltip with the certification information. The tooltip also shows who certified the dataset and the date and time of the certification.
Each change to the previously certified dataset removes its certification, and as a result, will require the dataset’s recertification. If multiple users are certifying a dataset at the same time, the last saved changes are applied.
Datasets export and import
In this release, dataset management capabilities include the options for dataset export and import. This way, users can save time and reuse the datasets in different environments.
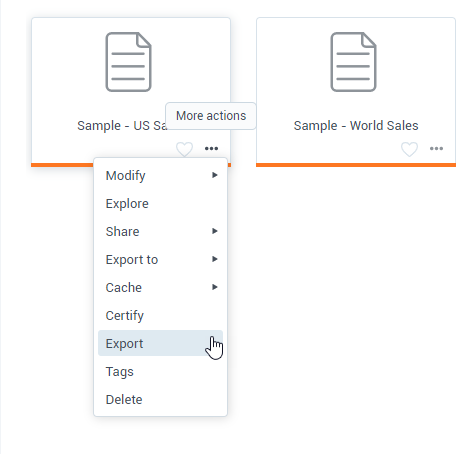
To export a dataset, in the Datasets pane, select the dataset, and under the More actions menu, click Export. The dataset with all underlying data sources, connections, and AI connections will be then saved into a ZIP file.
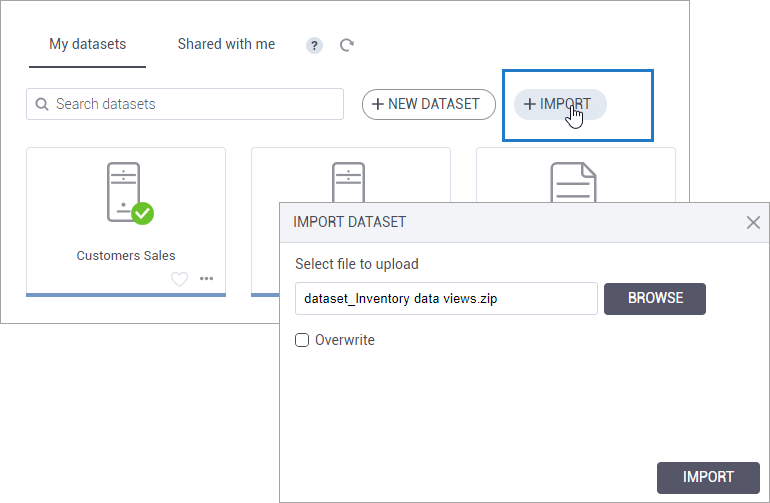
To import a dataset, you will need to upload a corresponding ZIP file. In the Datasets pane, clicking the Import button will open the dialog for the file import. You can specify whether to overwrite the dataset if the same element has already been imported previously. If the same dataset already exists, then the dataset will not be imported.
Datasets tags
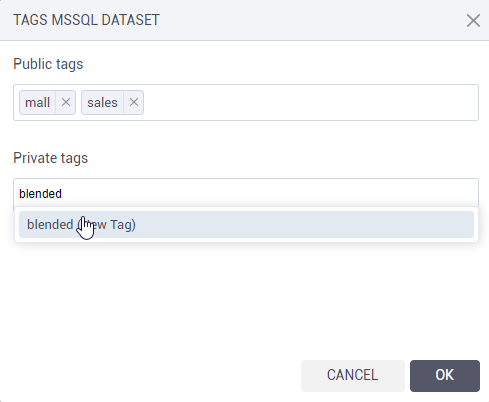
Tags are keywords that you can add to your datasets to help users better categorize and find datasets. When searching for datasets, users can now use tags for their search criteria.
Datasets can include two types of tags:
- Public tags — Automatically visible within a tenant so that other users may reuse the same tags for their datasets. For a shared dataset, public tags are available to all recipients, in view mode.
- Private tags — Visible only for the user who created them.
Data cleaning
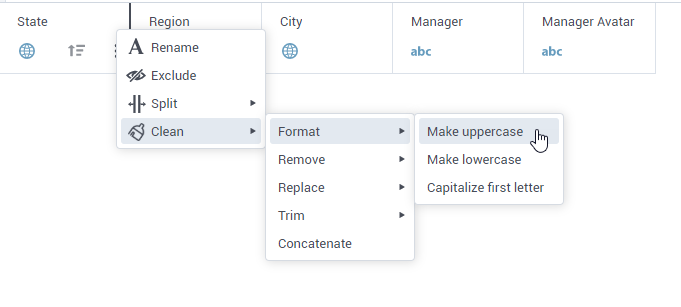
A range of data cleaning functions is now included in the column menu to help dataset modelers ensure data accuracy and consistency. The Clean column menu contains the following data cleaning options: Format, Remove, Replace, Trim, and Concatenate.
Format values
The Format menu allows you to convert all the column values to uppercase, lowercase, or capitalize the first letter. Formatting can be a great time-saver to ensure consistency in values naming and capitalization.
Remove unnecessary values
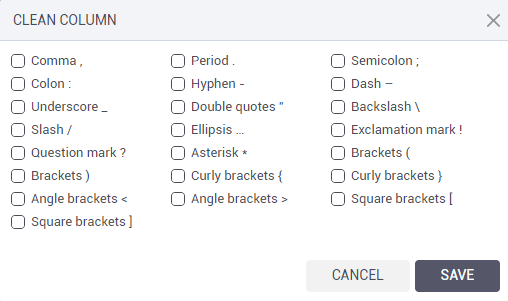
You can quickly remove NULLs, blank values, and punctuation marks of your choice by using the Remove option for the string column types.
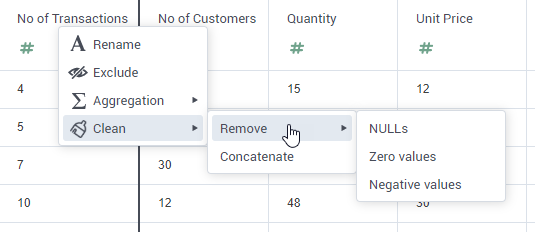
For the numeric type of data, the available options allow you to remove NULLs, zero values, or negative values.
Replace NULLs or any specified value
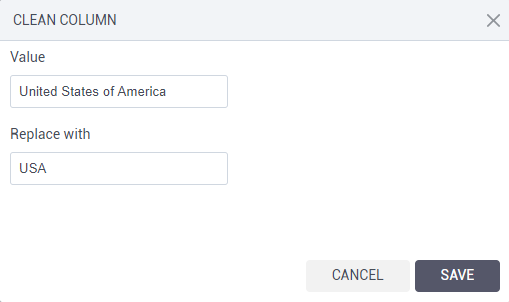
In the new Replace column option, you can replace all the occurrences of the NULL or any specified value with another value. This option can be also used to correct spelling errors.
Trim spaces and characters
Get rid of unnecessary spaces or any leading/trailing characters of your choice by using the Trim options:
- Leading & Trailing spaces – To remove spaces at the beginning and the end of the string.
- Leading spaces – To remove spaces at the beginning of the string.
- Trailing spaces – To remove spaces at the end of the string.
- All spaces – To remove all the spaces.
- Leading character – To remove the specified character at the beginning of the string.
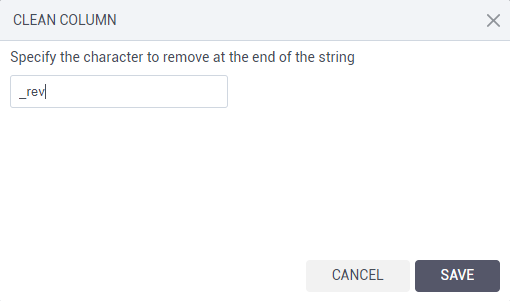
- Trailing character – To remove the specified character at the end of the string.
Concatenate columns
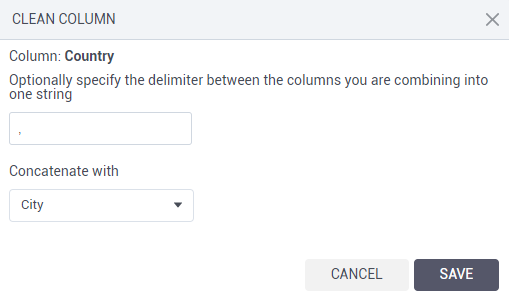
Using the new Concatenate column option, you can join the selected string column with another one. Moreover, you can specify a separator in between, if needed. In the separator field, one space is set as the default option.
Split a column into multiple columns
In this release, with the new Split column menu, you can split one column into up to 3 columns based on a selected delimiter or by characters’ length.
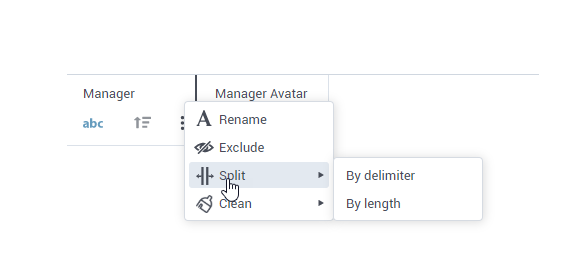
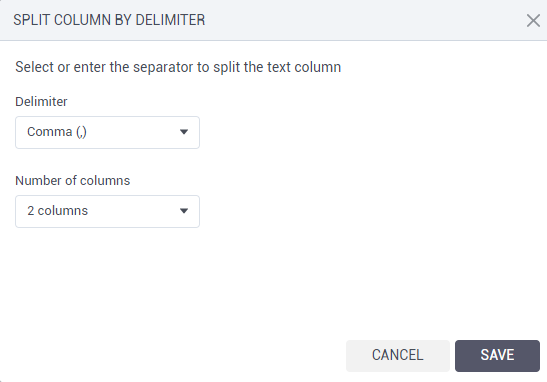
To split a column by a delimiter, select a separator from the list or specify a custom character at which to split the column.
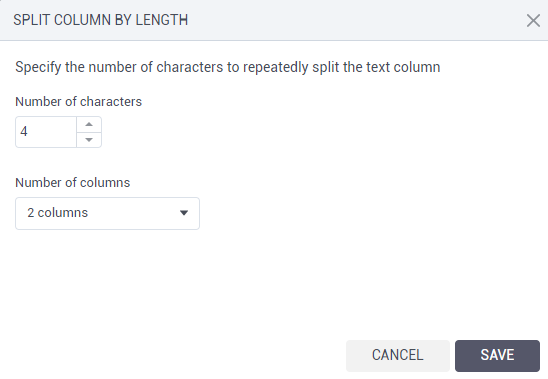
If you opt for splitting by length, specify the number of characters to repeatedly split the text column. For example, you can split the selected column into two columns every five characters. This option can be helpful if you have IDs of a certain length at the beginning – you can add one split that equals the ID length.
Bulk rename columns in a data source
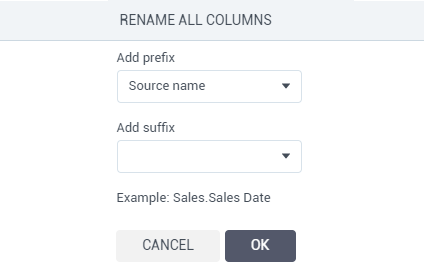
To keep dataset column names consistent, you can benefit from the bulk columns renaming within a data source. Next to a data source name, click More options > Rename > Rename all columns, and specify a pattern on how to rename all the columns:
- Add prefix – Add a data source name or any custom text, at the beginning of the column name.
- Add suffix – Add a data source name or any custom text, at the end of the column name.
The example at the bottom of the dialog box will reflect all the selections based on the first column name. The example is convenient to preview the pattern results that you are applying to all the columns.
Resolve duplicate column names
This release offers a way to resolve duplicate column names. When clicking Finish in the last step of the dataset creation process, you will see the list of duplicate columns, and there you have three options on how to proceed:
- Hide duplicates – The first occurrence of a duplicate column remains in the dataset, the rest of duplicate columns become hidden.
- Rename duplicates – The system automatically renames all duplicate columns by adding the source name in the beginning as follows.
- OK – Click to resolve all the duplicates manually.
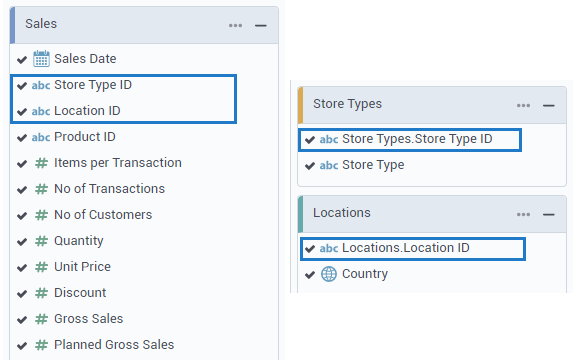
The duplicates are highlighted in red to help users find the columns if they decide to rename them one by one manually.
String function for splitting columns
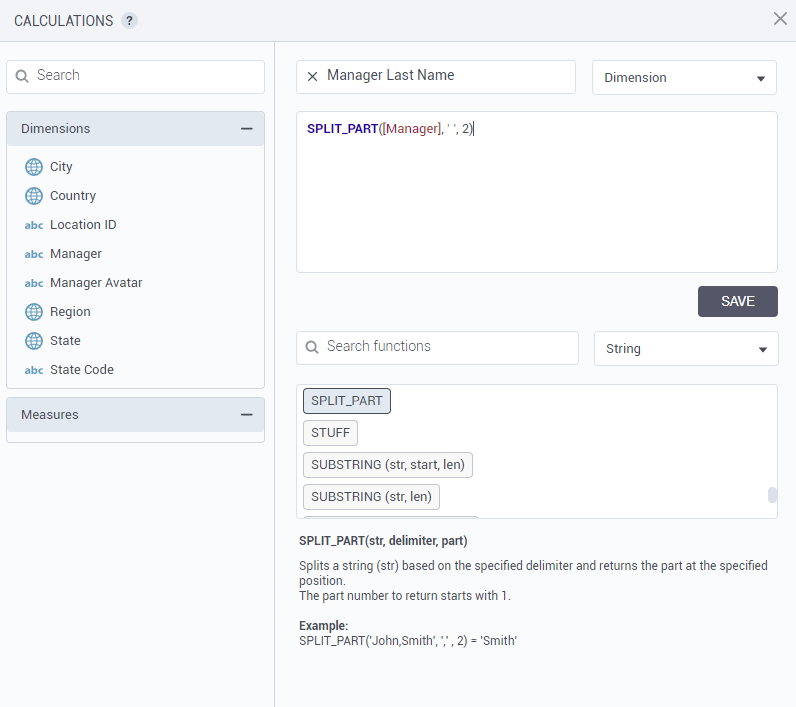
The new split function now appears in the list of string functions in the Calculations pane. This function allows you to obtain a specific part of the string based on a separator of your choice.
Scalar script function for data science
Prior this release, you could use only the SCRIPT function that sent a set of values as a table to the server for processing and received an array of rows for a new calculated column. To cover the use case where each row needs to be executed separately, you can now use a SCALAR function in the Calculations pane.
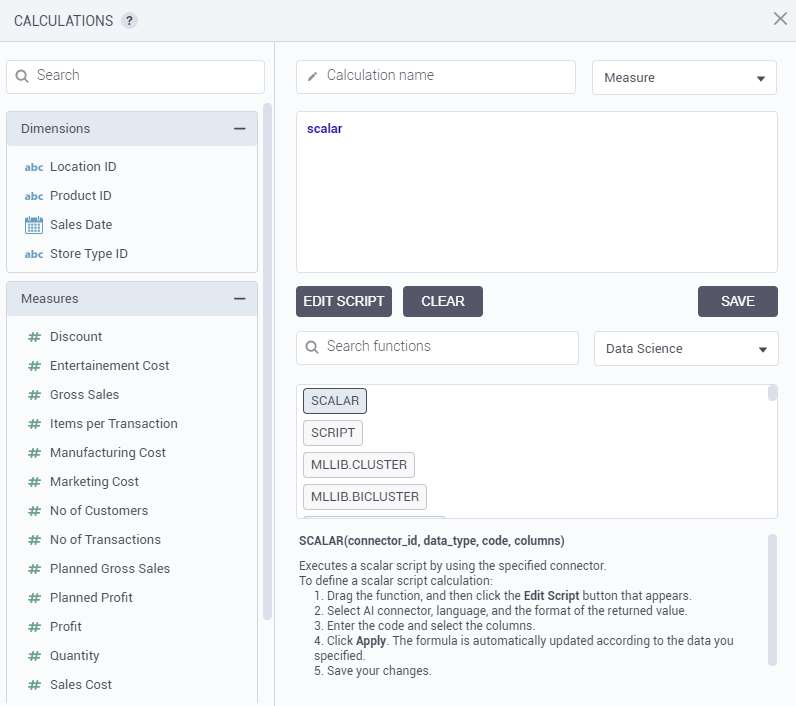
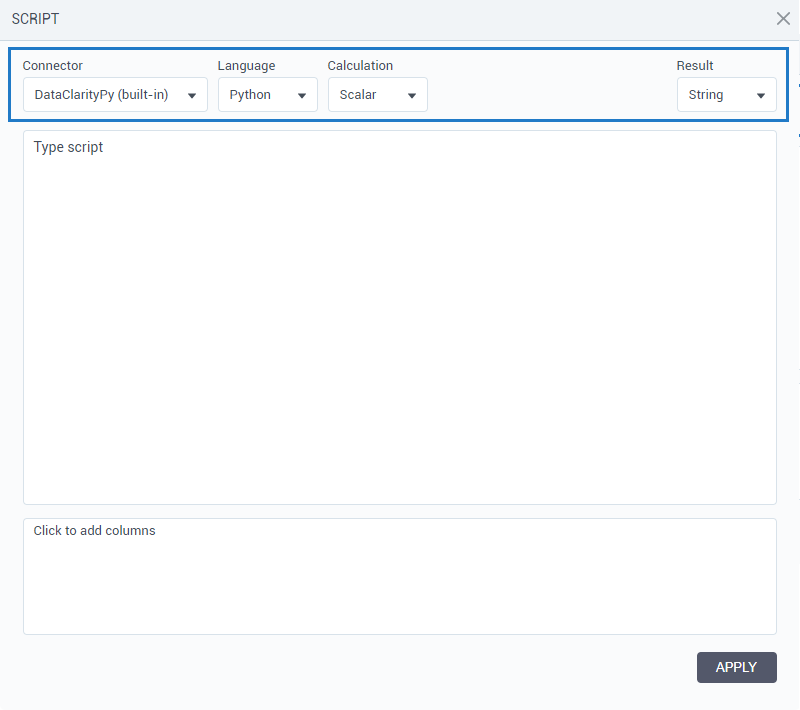
After clicking the Edit script button, the calculation type is set to Scalar for such a function. You can quickly switch to the Script function by selecting Vector in the drop-down list.
Support BLOB data type in datasets
Now, you can use the BLOB type of columns with image binary data in the datasets. To visualize image type columns, you can use the Table widget. For details, see Image columns in Table widget section.
Load more datasets into view
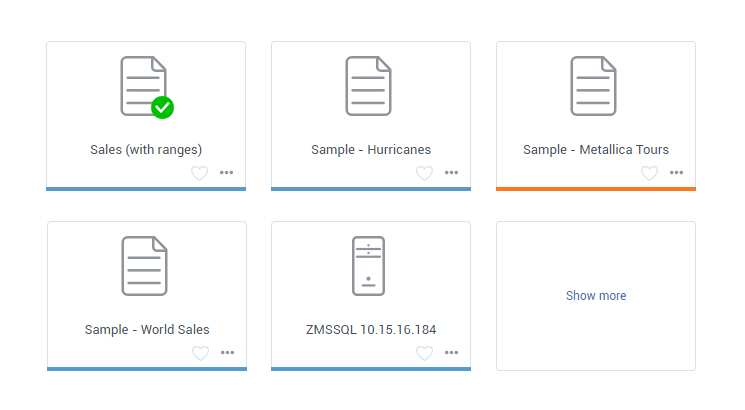
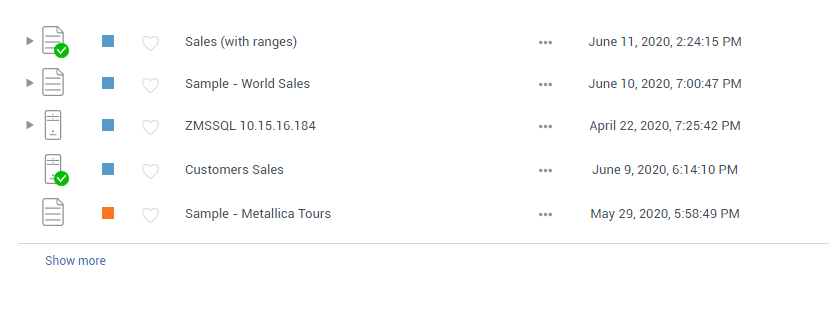
The new pagination technique has improved the performance of Data Preparation. When you open the Datasets pane, it loads the first set of 20 datasets. If the number of user datasets exceeds 20, the new Show more link appears at the end of the dataset list. Click this link to load another set of 20 datasets into the view, and so on.
In Tile view, the last tile appears with the Show more link on it.
In List view, the Show more link is placed right under the last dataset in the list.
AI connections export and import
When managing AI connections, you can now benefit from the new capabilities like connection export and import. AI connections can be easily reused in different environments saving your time spent for manually recreating new ones.
To export any of your AI connections, in the AI connections pane, find the needed item, and under the More actions menu, click the new Export option. The AI connection details that you are exporting will be saved into a ZIP file.
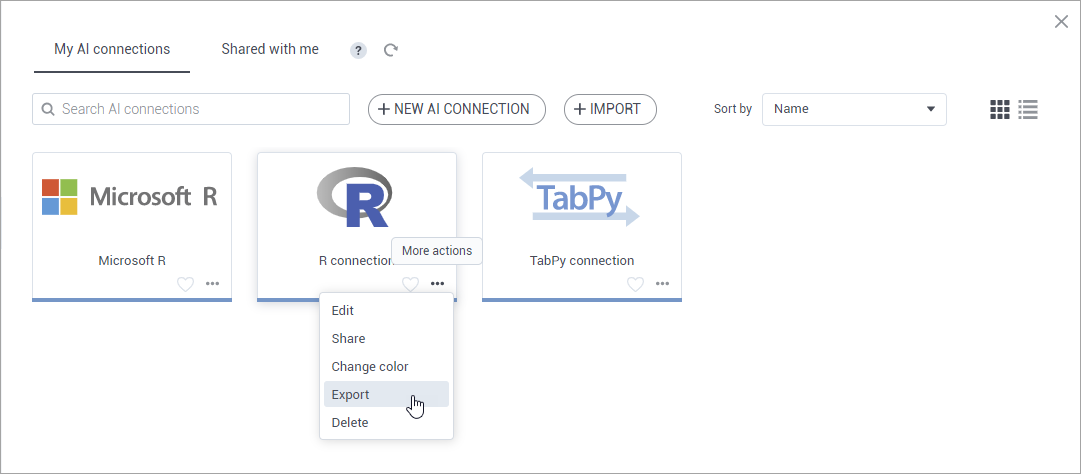
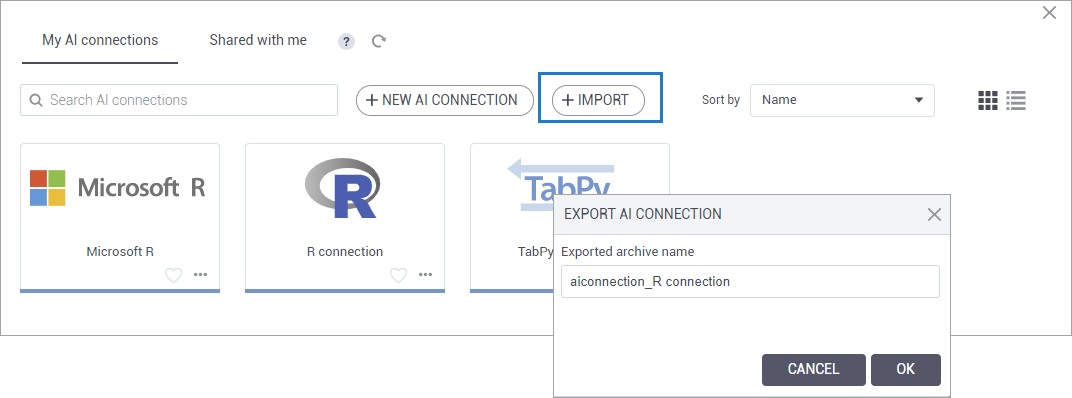
To import an AI connection, upload a corresponding ZIP file with the connection. In the AI connections pane, clicking the Import button will open the dialog for the file import. You can specify whether to overwrite the connection if the same data connection has already been imported. If the same connection already exists, then the data connection is not imported.
Built-in DataClarity Python server
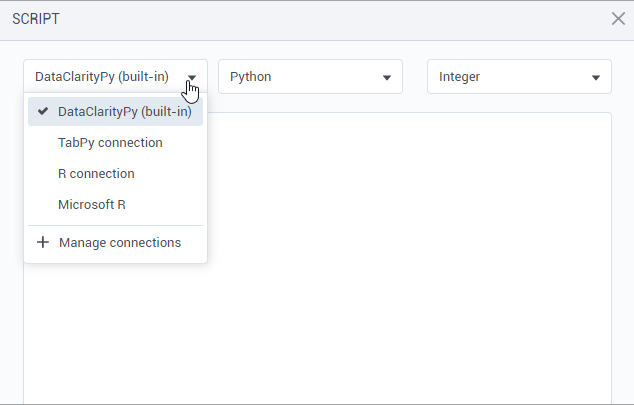
Now you don’t need to create an AI connection to use the built-in DataClarity Python server. It is available right away when working with a script function.
Encrypted data connections credentials
The data connection credentials are now stored in an encrypted format to ensure the security of data sources.
STORYBOARDS
Certify storyboards
To help users find storyboards that are trusted and recommended for their analysis, you can certify the storyboards. For best search results, only certify the storyboards that are valuable and considered the official source of enterprise information. Storyboard certification ensures the data is reliable and can be used across the organization.
Before performing this task, confirm that users have the dedicated permission to certify storyboards, granted in Access Manager. If you can certify storyboards, you can find the Certify option under the More actions menu for the storyboard. Users can mark storyboards as certified by selecting the Certify this storyboard check box. In addition, you can add a note about the certification status with descriptive information.
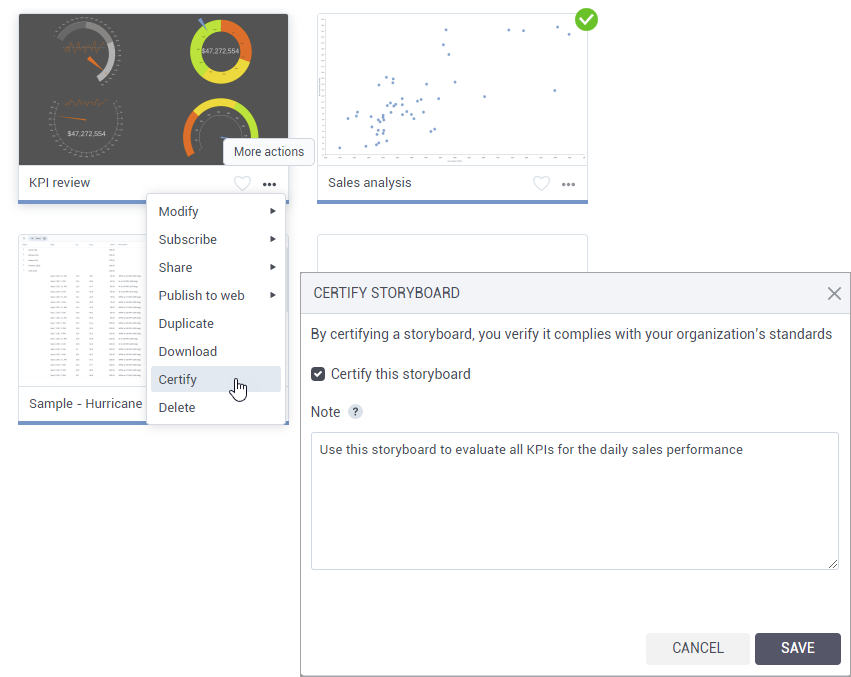
The storyboards have a green check mark in the upper-right corner of the tile. Pointing to the certification icon will reveal additional certification information.

In List view, the certification icon appears in the first column in front of the certified storyboard.

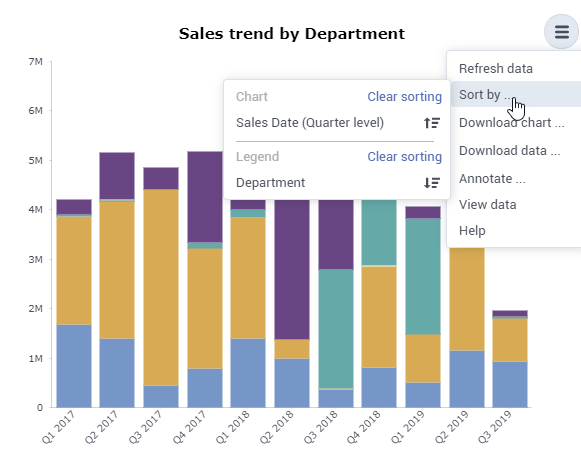
Enhanced sorting in widgets
When sorting data within the widget, the columns you sort are now shown under dedicated sections. Click the data to change the sorting order. Additionally, you can clear sorting that was previously applied to the widget.
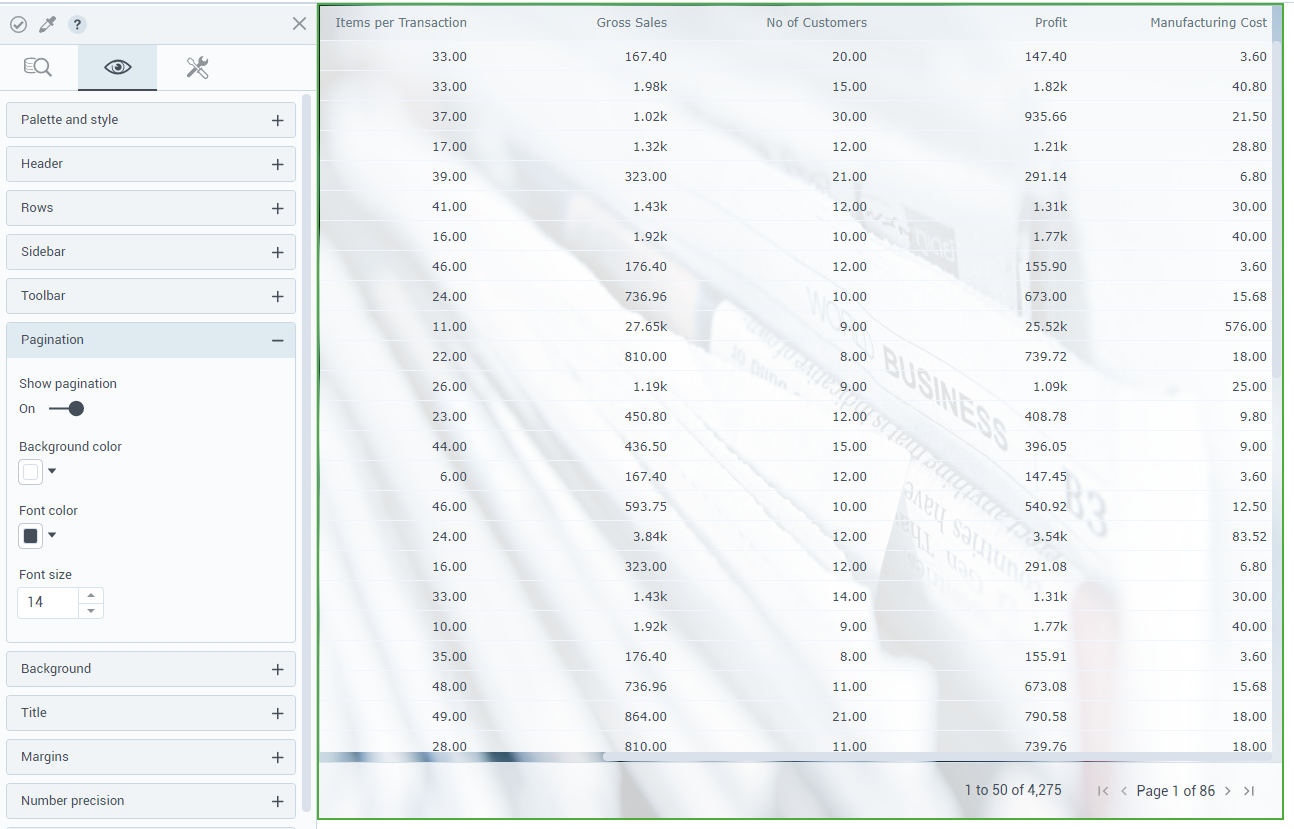
Background image for the Table widget
In this release, users can further style the Table widget by setting a background image.
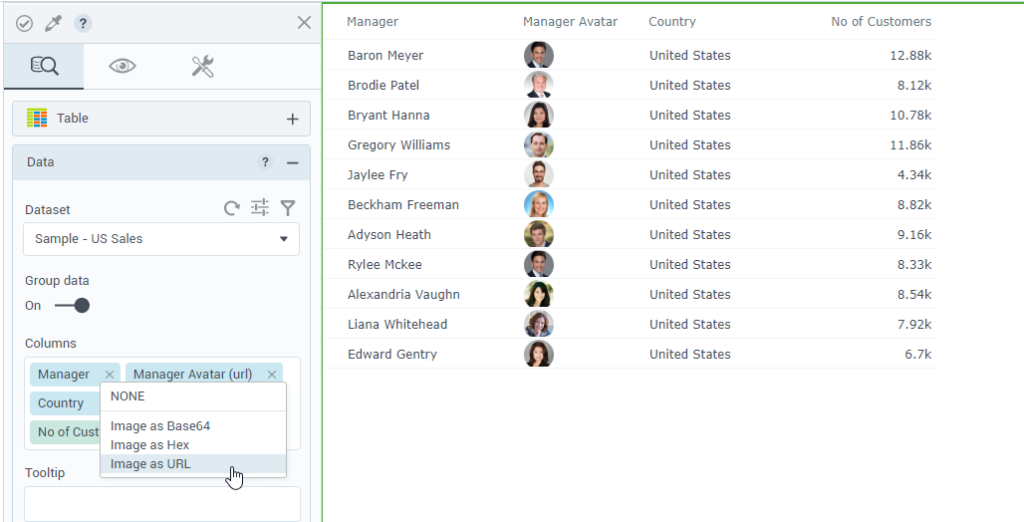
Visualize image columns in the Table widget
In this release, using the Table widget, you can visualize images provided as blobs or as URLs pointing to the respective files.
When selecting such columns in the data tab, specify one of the available aggregation options to ensure the image is interpreted accordingly:
- Image as Base64
- Image as Hex
- Image as URL
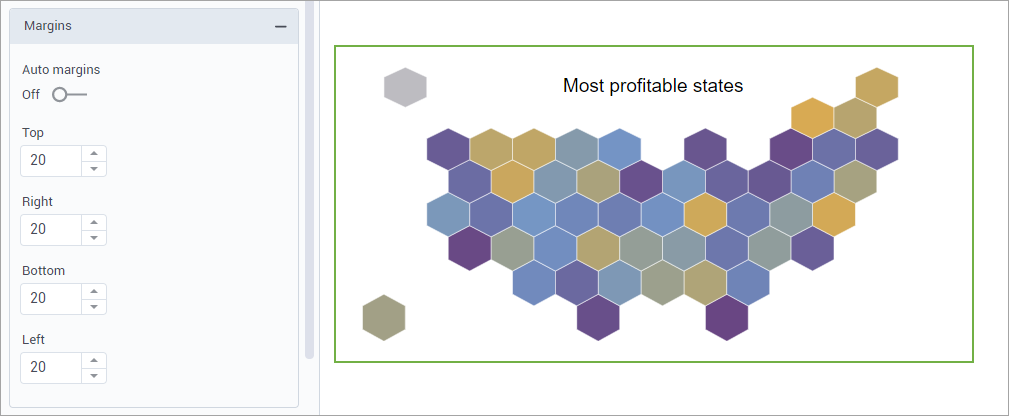
Margins for geospatial widgets
In addition to the default margins, you can now define any margins needed to display your geospatial widgets. Just enter the value for the top, right, left, and bottom margins.
Customize lines and direction arrows in the Path map
To better visualize map routes, the following customization capabilities have been introduced:
- Scale line & arrow – To apply an automatic scale to the path lines and arrows. This way, the size of the lines and arrows does not change when you zoom a map.
- Arrow width – To set the width of the direction arrow.
- Arrow height – To set the height of the direction arrow.
General
Change content ownership when deleting a user
In this release, you have more flexibility with managing content that was created by the platform users. If a content owner is deleted in Access Manager, administrators can now choose whether to delete the content permanently or reassign it to another user. This feature may be especially useful if you need to comply with the GDPR requirement on personal data deletion from the system.
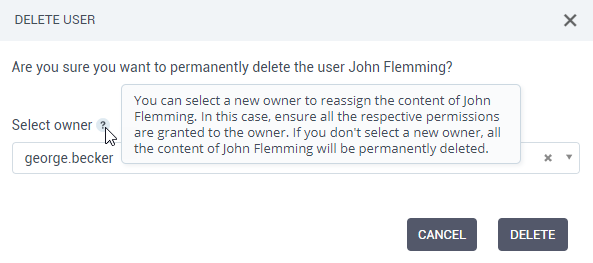
If the content that is being transferred requires new user authentication, the new owner will receive an email asking to get authenticated in the application.
Audit user activities
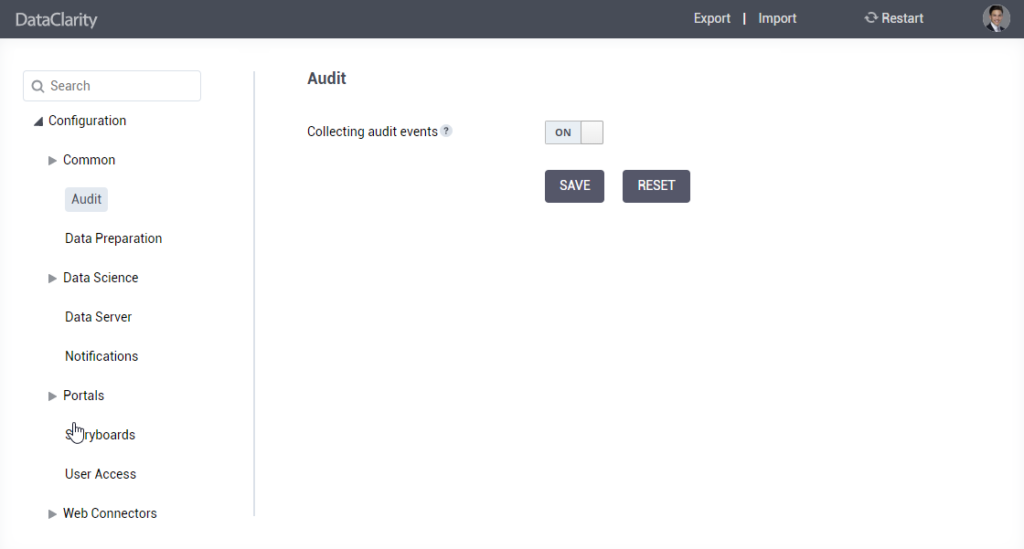
Administrators can now use the auditing service to track various user activities in Storyboards and Data Preparation. The new configuration setting, Collecting audit events, has been added to the Configuration Manager to allow administrators to activate or deactivate the audit logging.
Configure notifications lifespan
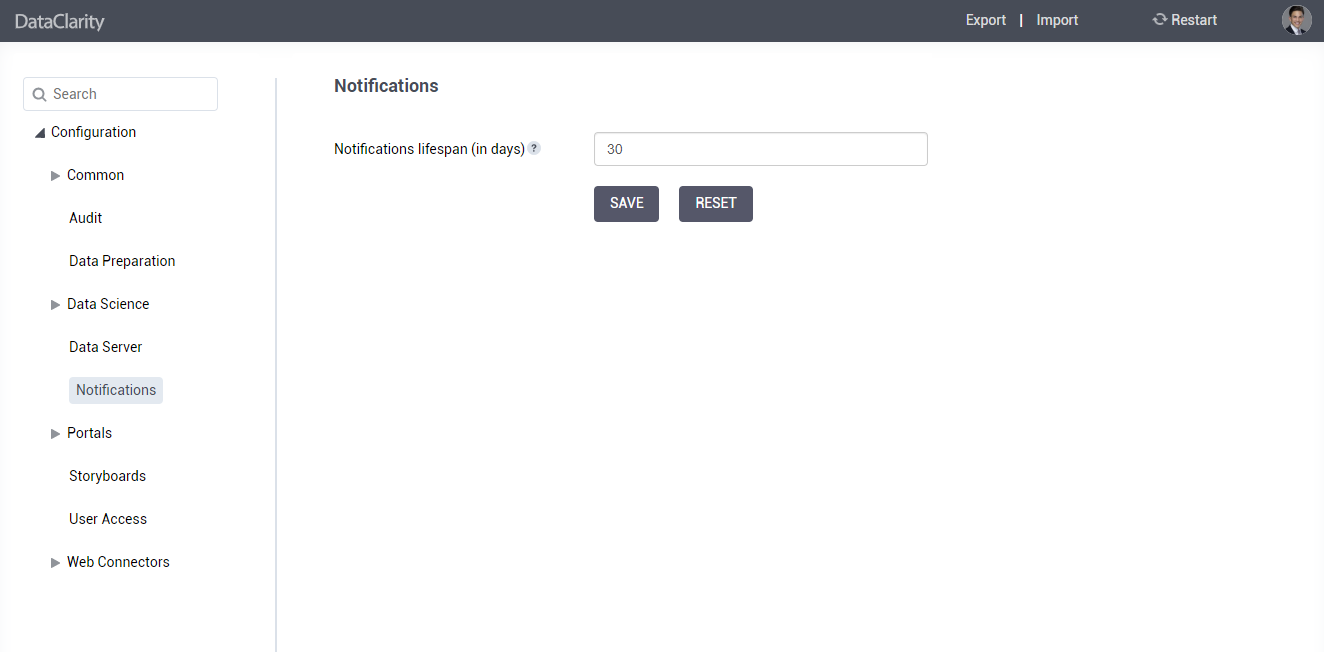
DataClarity administrators can now configure for how long to retain the notifications and storyboard images linked to them. By default, the notifications and the storyboard images are cleaned regularly to prevent storage overflow. The default notification lifespan is set to 30 days since the notification creation date.
Message broker configuration
DataClarity administrators can now specify a username and password to connect to the message broker (Apache ActiveMQ Artemis) used to interchange messages between the microservices in the DataClarity platform. For this, the new page called Message Bus has been added under the Common configuration settings.

Get started with DataClarity or upgrade to DataClarity 2020.5 today to take advantage of all of these new features.

